How to access Raspberry Pi by port forwarding with Ngrok
When developing a web site, we almost always develop them on our local computers, hosting and debugging their functionalities. But when it needs to be deployed, the usual practice is to get a proper domain from a reputed website such as GoDaddy and upload all your files to a file server and host the website from there. But what if your specific task does not require such a complicated web hosting service and you only need access to your local server in the most affordable way possible?
Well, a simple and intuitive solution would be to use a service such as Ngrok.
What is ngrok?
Ngrok is a simple yet powerful tool that can be used to expose a web server/ port of a Linux/Windows or Mac device that resides behind a NAT router or a tight firewall to the world wide web. A device being behind a NAT router means that usually, the devices connected to the network cannot be accessed directly from the internet. But by using this tool, we can access any port in our devices from anywhere in the world.
Use cases of Ngrok:
- Running personal cloud services on personal servers
- Demo websites prior to deployment
- Testing mobile apps that uses a private backend
- Accces linux devices through the internet (SSH or VNC connections) which are not exposed to the world wide web
- Bypassing firewalls and NAT limitations and accessing certain ports (MQTT server ports, PiHole DNS servers etc.)
Accessing nginx web server (or any other server) on your Raspberry Pi Linux device through the internet
Consider you’ve set up a Nginx web server and it’s up and running in your Raspberry Pi, in your local network. Now you need to access this web server through the internet, from anywhere else int he world. In order to do this, either you need to expose your device’s port to the internet, and this can be a security risk to the whole network. Therefore, you may use Ngrok to do this task easily and securely.
Setting up Ngrok on your Raspberry Pi/Linux Device
To setup Ngrok on your Raspberry Pi or Linux device (also compatible with Windows or Mac computers), first you need to sign up for the service to benefit the full control.
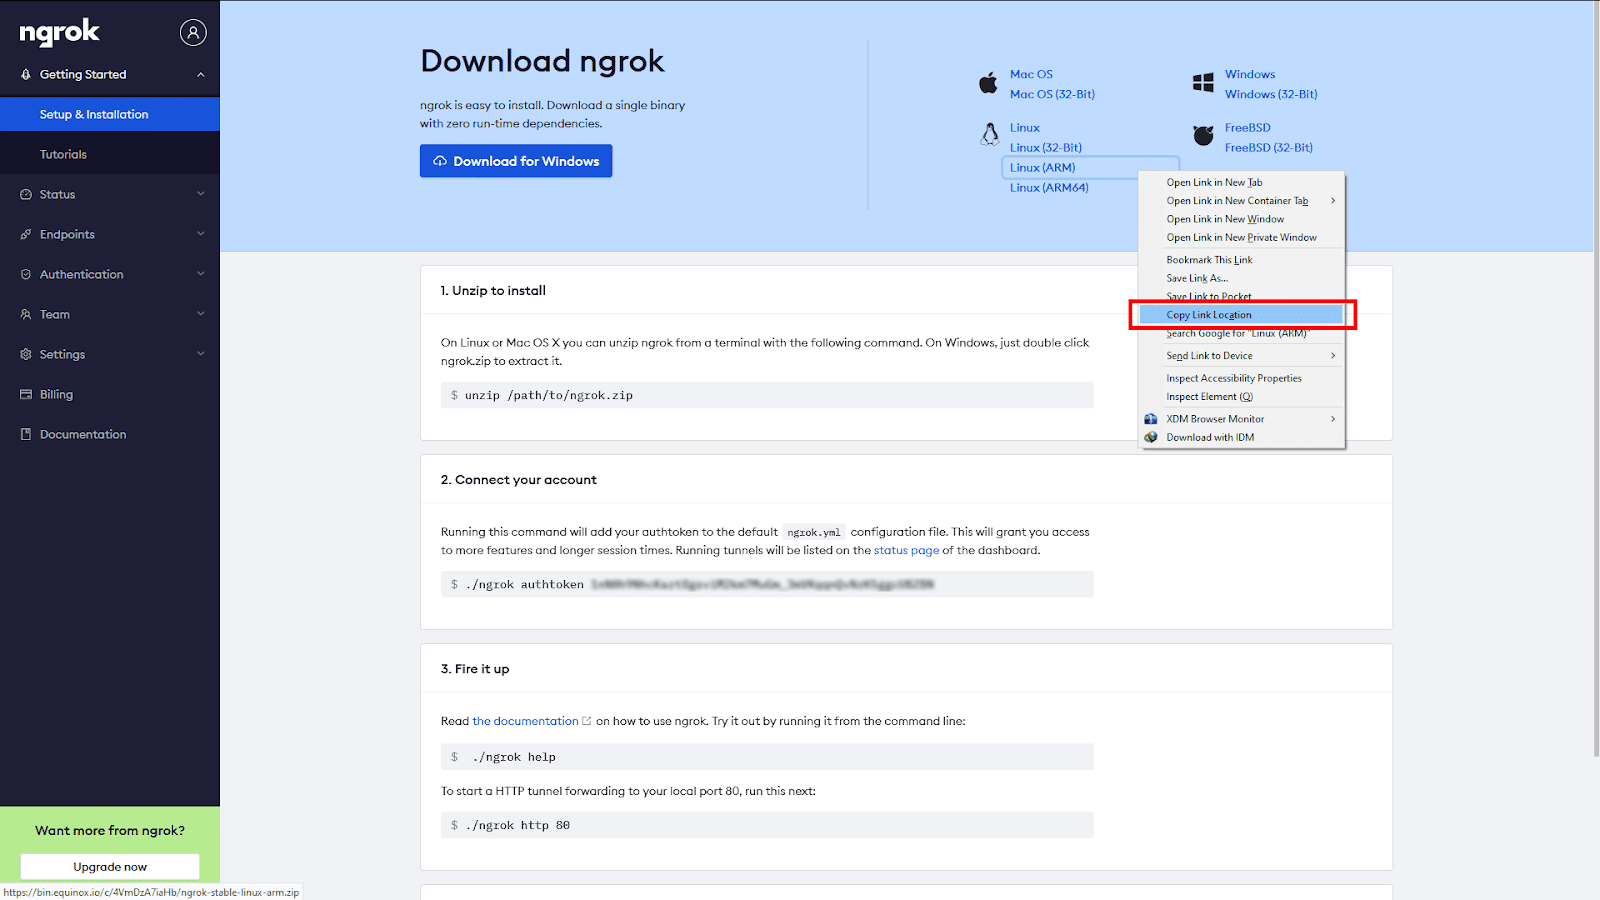
Then go to the ngrok dashboard and copy the link for Linux ARM.
After copying the link, navigate to a folder of your choice in your Raspberry Pi through the terminal using cd /path/to/a/folder command. You can choose any path that you have write access to. An example would be /home/ folder.
Then use wget <copied link=””> to download the </copied>ngrok-stable-linux-arm.zip to the current directory.
(example wget https://bin.equinox.io/c/4VmDzA7iaHb/ngrok-stable-linux-arm.zip)
By issuing unzip ngrok-stable-linux-arm.zip the Ngrok executable can be extracted. (if unzip program is not available in your system, you may use sudo apt-get install unzip to install it)
Starting an ngrok tunnel
Type ./ngrok http <port number=””> to start Ngrok service, exposing the port. The <port number=””> can be any port you want to expose, in the example, the nginx server is running on port 80, therefore the command would be ./ngrok http 80</port></port>
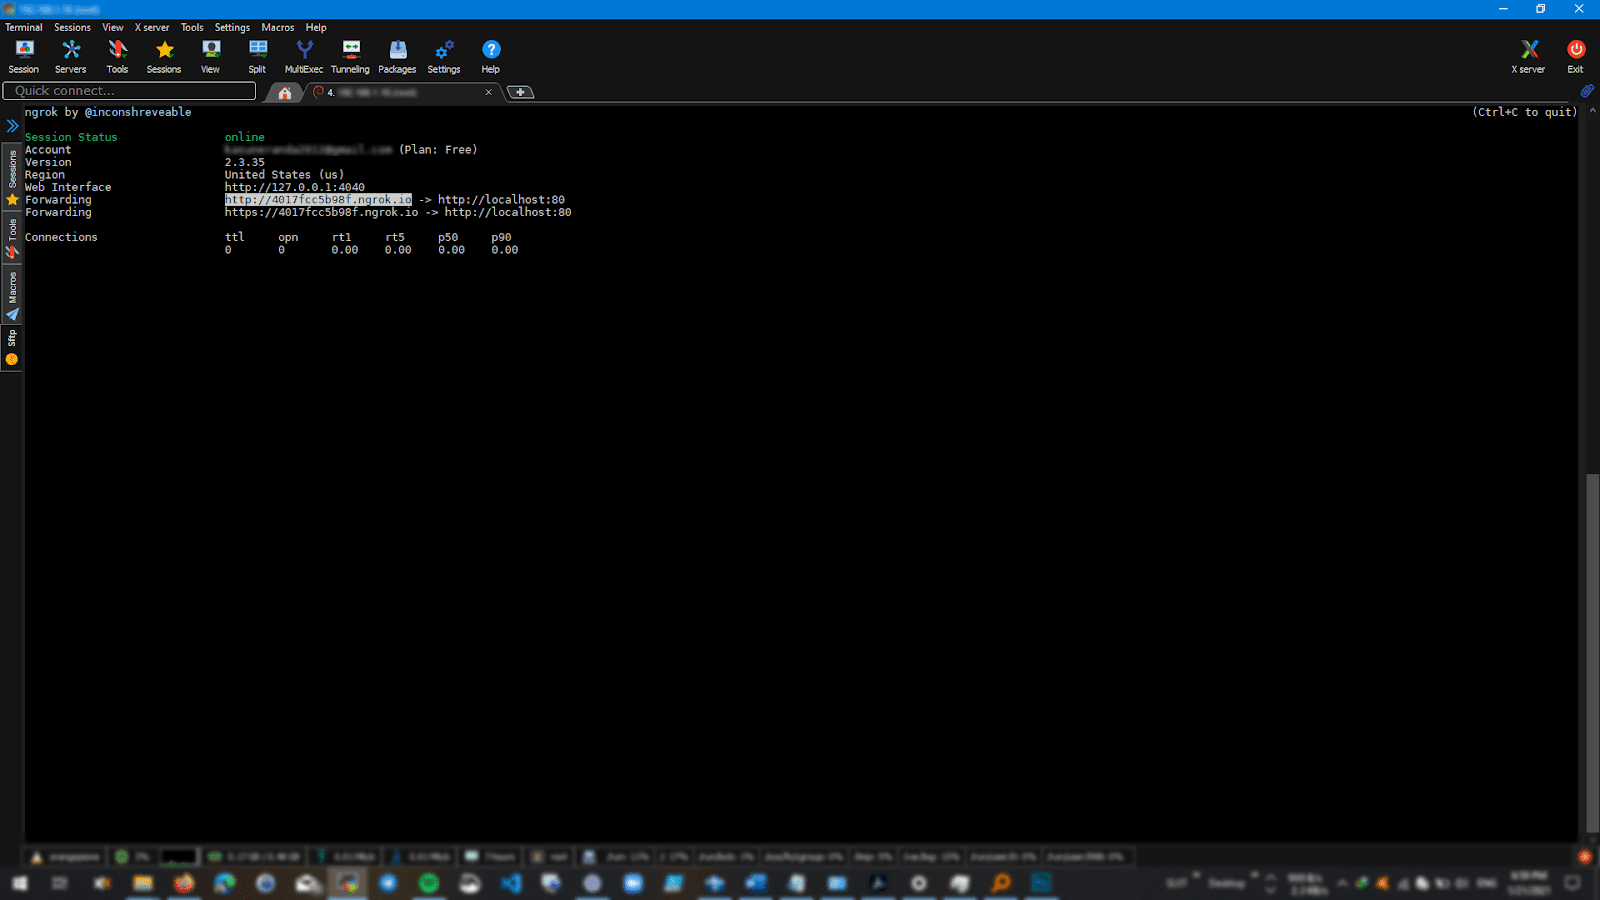
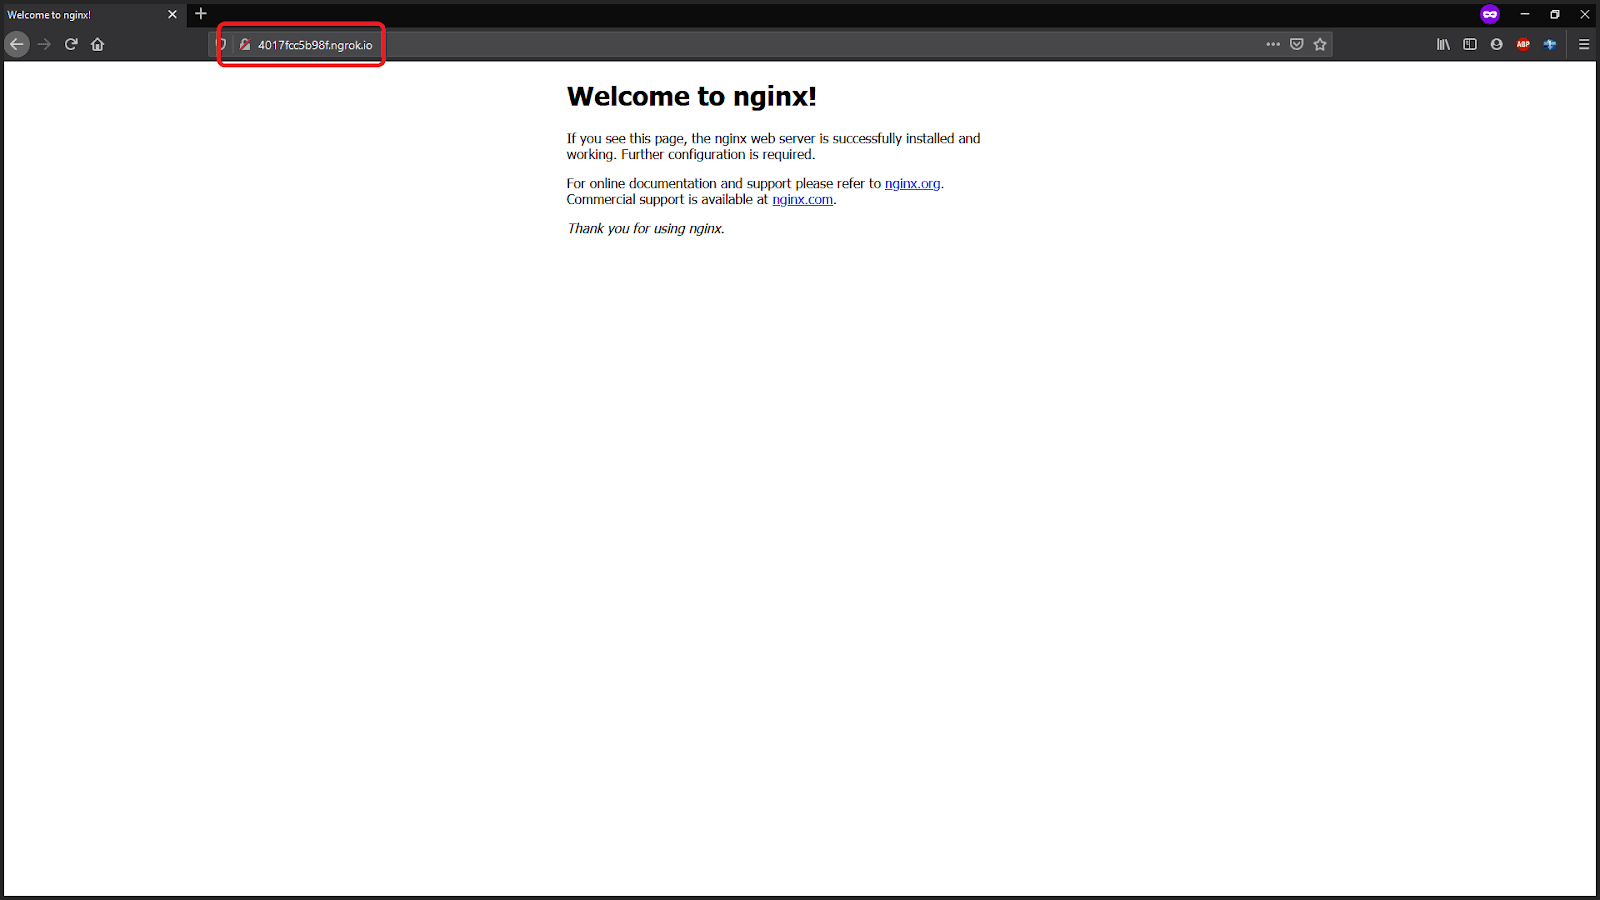
Then you will be given a response similar to the above terminal output. You can then copy the highlighted URL to paste in a web browser to access the web server from anywhere in the world.
Accessing your Raspberry Pi web pages / ports through the internet enough?
In most cases, just being able to access a port or a web server on your Raspberry Pi may not be enough. The Ngrok is a good solution when it comes to personal usage. It provides TLS security, authentication tokens and everything, however, when it comes to industrial grade IoT device management solutions, just accessing your Linux edge devices over the internet isn’t going to cut it. You’re going to need to be able to do a whole lot more, including, but not limited to:
- Over the air software updates
- Remote Monitoring – from resources to your device application process
- Data Logging
- Secure devices
- Remote Control Access – SSH, VNC, port forwarding, etc.
- Easy management of multiple devices, arranged by groups, name and location.
- Map and user
This is where JFrog Connect comes in to assist you. We have built an all-in-one platform where you can perform all those tasks with ease, with a single click of a button.
Visit our website and follow the getting started guide to get to know more about JFrog Connect!


