Best Practice Guide – Deploy Container Update
This guide goes over the best practice to fill and create an Over-The-Air Container update to your product fleet. The best practice guidelines are taught how to fill a Container update recipe for Linux based products while using the best technics to make the software deployment effective and successful as possible.
The Container update recipe approach
This approach is based on the Docker container engine. The Container update tool works only on Linux based devices that run a Docker container engine. To install the Docker engine on your edge Linux device, read JFrog Connect docs.
Guidelines
1. Under the Update category, click on the ‘New Container Update’ section.
2. In the general details section, select the devices you would like to deploy the next Container update. Then, fill the update version, for example: v1.1.2 and the comment row with relevant details about this update.

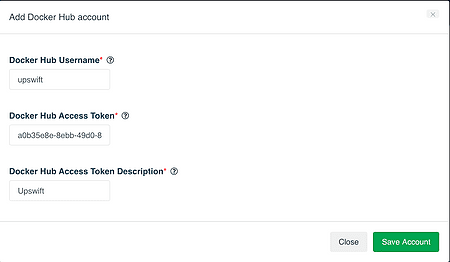
3. In the ‘Container details’ section, integrate your DockerHub account with JFrog Connect. Choose a private or public repository, and click on the ‘add account’ button to fill your DockerHub account details.
To fill the ‘Docker Hub Access Token’ parameter, create Access Tokens at the dashboard of your Docker Hub account in the ‘Security’ category under the ‘Settings’ page and copy&paste the access token in accordance.
4. Fill in the deployment details: DockerHub repository name, image tag you would like to deploy, the Docker ‘run’ parameters and commands, if needed.
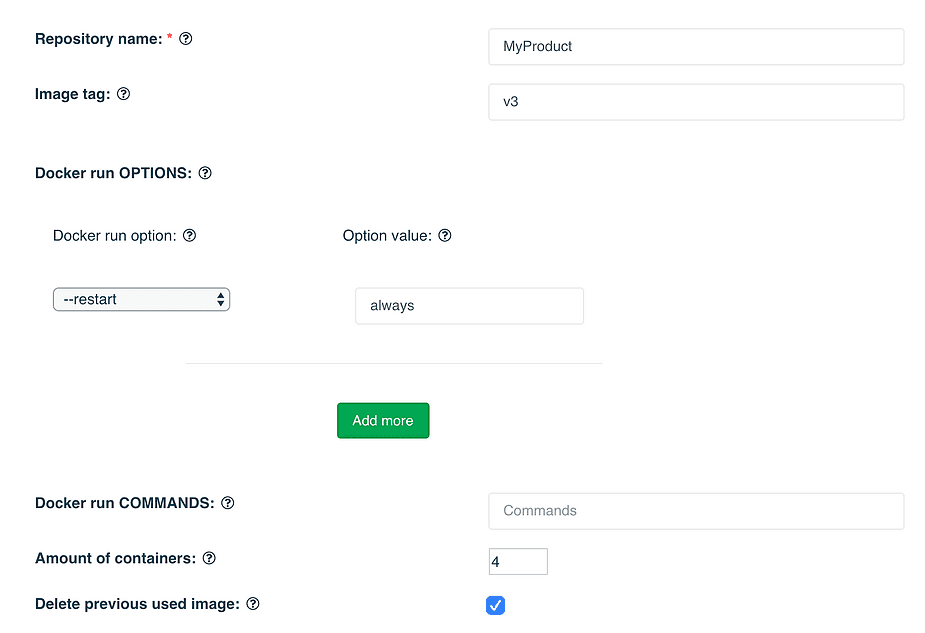
5. Choose the number of containers you would like to deploy from your repository image and if to delete the currently used image (this option works only if the same repository is currently used on the deployed device).
6. Finally, check the Rollback option to re-start the running containers from the same repository that was before this deployment.


